When you're ready to monetize your ConvertKit newsletter, you have a big decision to make. Should you use an ad network or manage sponsorships yourself? Handling your own ad sales means building a direct system for everything from finding sponsors to negotiating prices and managing the content. It's more hands-on, for sure. But it also means you own the entire sponsor relationship, which almost always translates to more revenue and a better fit for your brand.
Why You Should Manage Ads Directly in ConvertKit
Letting a third-party ad network handle your sponsorships can seem like the easy route, but that convenience comes at a cost. You give up a lot of control and a hefty slice of your potential income. When you manage your own newsletter ads, you're no longer just another publisher in a vast network. You become a direct partner to brands you believe in.
This shift is about more than just money. It’s about creating a better experience for your subscribers. You get to hand-pick sponsors that actually make sense for your audience, making the ads feel less like a jarring interruption and more like a genuine recommendation. That kind of alignment builds trust and keeps your newsletter's quality high.
The Financial Upside of Direct Sponsorships
Let’s be honest, the biggest draw for managing your own ad sales is the money. Ad networks act as a middleman, and they take a significant cut for their services. When you sell directly to sponsors, you keep 100% of the revenue.
Think about a real-world case like the Workspaces newsletter. The creator, Ryan Gilbert, grew his list to over 30,000 subscribers. By selling sponsorships directly instead of using an ad network, he was able to command a flat fee of over $1,000 per issue. That consistent, predictable income is something ad networks rarely provide. This simple change can be the difference between a side project and a full-time business.
Gaining Full Creative and Operational Control
When you manage sponsorships directly, you're in the driver's seat. You decide what the ad looks like, where it goes in your newsletter, and what it says. This level of control ensures every piece of sponsored content meets your standards and fits naturally with your voice.
You can also get creative with your offerings. Instead of a one-size-fits-all ad slot, you can create custom packages for sponsors. Maybe you offer a multi-issue campaign or a bundle that includes a social media shoutout. These custom deals add more value for the sponsor and allow you to charge premium rates.
Taking ownership of your ad operations means you're not just a content creator; you're building a media business. This model gives you the power to forge stronger sponsor relationships and a more sustainable revenue stream.
The opportunity here is huge. Just to give you an idea of the scale, creators on a single popular platform sent over 28 billion emails in one year. That’s a staggering amount of ad inventory waiting to be filled. With ConvertKit’s powerful deliverability and your great open rates, you have compelling data to show potential sponsors why your newsletter is worth the investment.
Direct Ad Management vs Ad Networks
To make it even clearer, let's break down the key differences between managing ads yourself in ConvertKit versus using an ad network.
| Feature | Direct Management in ConvertKit | Third-Party Ad Network |
|---|---|---|
| Revenue | You keep 100% of the ad revenue. | The network takes a significant cut (often 20-50%). |
| Sponsor Quality | You hand-pick sponsors who align with your brand. | You get what they give you; often irrelevant or low-quality ads. |
| Control | Full control over ad format, placement, and messaging. | Limited to no control; ads are inserted automatically. |
| Relationships | You build long-term, direct relationships with brands. | No direct contact with the advertisers. |
| Workload | Requires more initial setup and ongoing management. | Almost completely hands-off and automated. |
| Pricing | You set your own rates and can negotiate custom deals. | Based on fluctuating CPM/CPC rates set by the network. |
While a network might seem easier upfront, the long-term benefits of direct management for both your finances and your brand's integrity are hard to ignore.
Ultimately, building your own system for managing newsletter ads is an investment of your time. It takes some effort to get going, but the rewards are well worth it. You'll see greater income, better brand alignment, and a happier, more engaged readership. For a deeper dive, take a look at our complete guide on newsletter advertising best practices.
Defining Your Ad Inventory and Pricing
Before you can sell anything, you have to know what you're selling. For a newsletter, that means defining your ad inventory. These are the specific, clearly defined sponsorship slots you're offering. Getting this right from the start makes the entire sales process smoother for both you and your potential sponsors.
Think of your newsletter like a physical magazine. You wouldn't just cram ads in randomly. You’d have premium full-page spreads, half-page features, and a classifieds section in the back. The same idea applies here. Most newsletters find success by starting with a few standard ad types.
Common Newsletter Ad Slots
You don't need a dozen options. In fact, it's better to start with just two or three solid choices.
- The Main Event (Primary Sponsor): This is your premium spot, usually placed right at the top of the newsletter, maybe with a "Presented by" line. It gets the most eyeballs and, naturally, commands the highest price.
- The Deep Dive (Mid-Roll Placement): Think of this as a dedicated section smack in the middle of your content. It's a fantastic spot for sponsors who want to tell a bigger story or share a more detailed message.
- The Classifieds: This is usually a small, text-only section near the bottom of your newsletter with a handful of sponsored links. These are your lower-cost, high-value slots perfect for smaller brands, indie creators, or even affiliate promotions.
Having a mix like this is smart. It lets you work with sponsors at different budget levels, which means you're more likely to sell out your inventory and can build a more diverse income stream.
How to Price Your Newsletter Ads
Okay, let's talk about money. Setting your ad rates can feel like pulling numbers out of thin air, but it really shouldn't be. Your pricing needs to be anchored in real data like your list size, your open rate, and how engaged your subscribers are.
The most common approach is a simple flat-rate model based on estimated impressions (opens).
Here's how that breaks down. Let's say you have a newsletter with 10,000 subscribers and a healthy 40% open rate. That means you can confidently tell a sponsor they'll reach around 4,000 readers every time you hit send. For any creator with over 10,000 engaged subscribers and a solid open rate, these unique open numbers become the foundation for fair pricing and reliable revenue forecasts. You can explore the dynamics of newsletter pricing further with insights from Unkoa.
A solid starting point for a primary sponsorship slot is typically between $25 to $100 per 1,000 opens. This metric is known in the industry as CPM, or cost per mille.
Let's Do the Math:
4,000 average opens x $50 CPM = $200 for a primary ad placement.
This isn't a hard-and-fast rule, of course. You can and should adjust this number based on how niche your audience is, your click-through rates, and what the sponsor is looking to achieve. If you want a hand with this, our free newsletter ad pricing calculator is a great tool for getting a data-backed baseline for your rates.
Create a Simple and Effective Media Kit
Your media kit is your sales pitch in a document. It's often the very first thing a potential sponsor will ask for, so it needs to look professional and answer all their initial questions. Trust me, having a good one will save you countless back-and-forth emails.
Keep it to one page. Here's what it absolutely must include:
- Who You Are: A quick, punchy intro to your newsletter and the audience you serve.
- The Numbers: Key stats like total subscribers, average open rate, and click-through rate. If you have any audience demographics (like job titles, interests, etc.), add those in. It's gold for sponsors.
- The Ad Menu: A clear list of your ad slots (e.g., "Primary Sponsor," "Classified Link") with the specs for each, like word count limits or required image sizes.
- The Price List: State your rates for each option. Be direct and confident.
- How to Reach You: Your name and email address. Make it dead simple for them to say "yes."
Don't overcomplicate it. A clean, well-designed PDF is all it takes to make a fantastic first impression and convince the right sponsors to partner with you.
Building Your Ad Management System in ConvertKit
Alright, let's get into the nitty-gritty of building the actual engine that will run your newsletter ad business. The idea here is to create a solid, repeatable system right inside ConvertKit. No need for a ton of extra, expensive software. By using the tools you already pay for, we can build a workflow that's surprisingly powerful and, more importantly, easy for you to manage.
This is all about moving away from manual, time-sucking ad management and turning it into an organized, almost-automated operation. We’ll be leaning heavily on custom fields, tags, and ConvertKit’s visual automations to make it all happen.
First, Let's Get Sponsor Data Organized with Custom Fields
Before we can automate anything, you need a central place to store all your sponsor information. Forget messy spreadsheets. We're going to use custom fields in ConvertKit to attach key details directly to each sponsor's subscriber profile.
Doing this keeps everything tidy and in one place, which is the foundation for a stress-free ad management system.
Go ahead and create these custom fields in your ConvertKit account:
- Sponsor Company Name: The official name of the brand.
- Sponsor Contact Name: Your main point of contact at the company.
- Ad Run Date: The exact date their ad is scheduled to go live.
- Ad Type: The specific ad slot they bought (e.g., Primary Sponsor, Classified).
- Ad Copy: A text field where you can paste their final, approved ad copy.
- Ad Link: The unique, trackable URL they want readers to click.
Once these are set up, you can get a complete snapshot of any sponsor’s campaign just by pulling up their profile. This simple bit of organization is what makes all the cool automation possible. If you find yourself juggling dozens of sponsors, a dedicated newsletter sponsor CRM might be worth a look, but for most creators, ConvertKit's custom fields are the perfect place to start.
This whole process really starts with having a clear inventory. You have to define what you're selling before you can sell it.
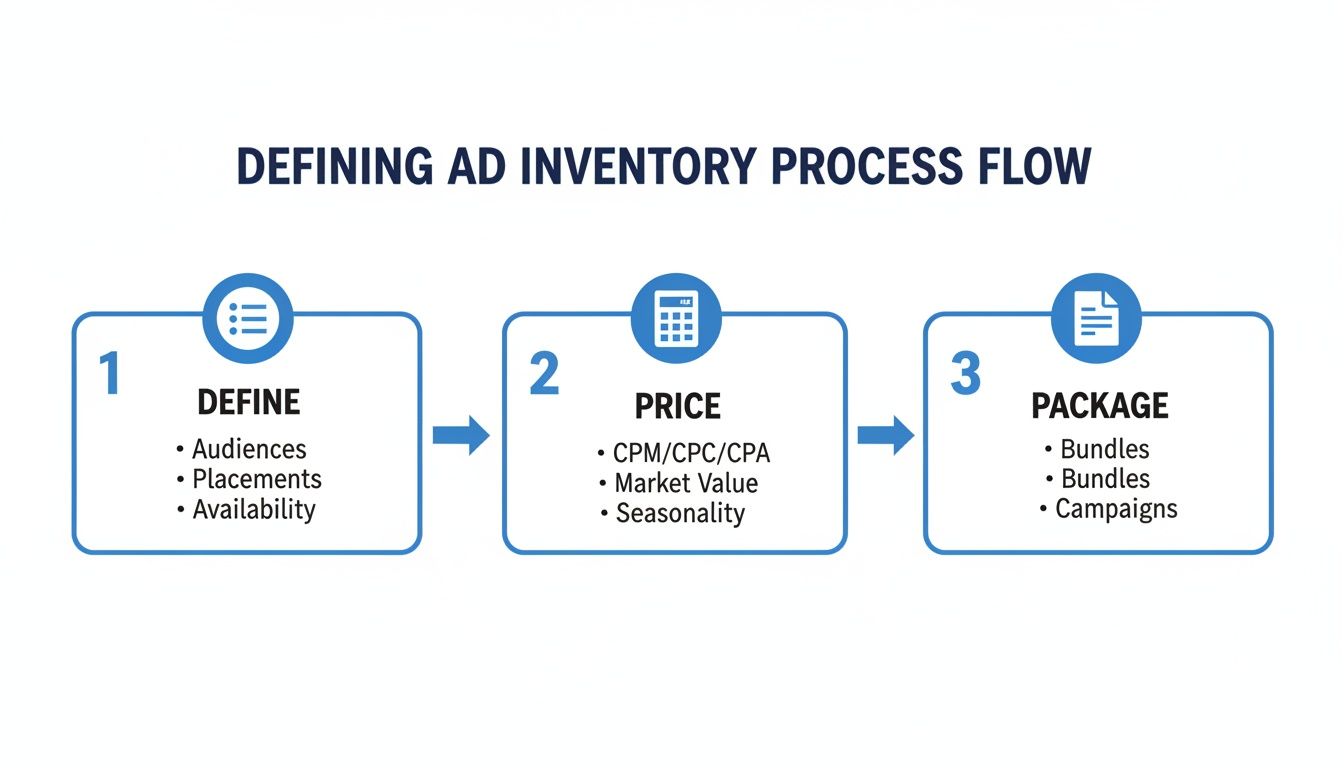
Think of it this way. A solid ad inventory strategy is the essential first step. Once you know what you’re offering, you can build the internal workflow to manage it.
Automating Sponsor Communication with a Visual Automation
Now for the fun part. With your data neatly organized, we can build a visual automation to handle all the back-and-forth communication with sponsors. This is where you'll reclaim huge chunks of your time and make sure important details never fall through the cracks. This automation will handle everything from pre-run reminders to sending post-campaign performance reports.
The real magic of building this in ConvertKit is turning those repetitive manual tasks into an automated sequence that just works. A well-designed automation doesn't just save you hours; it makes you look incredibly professional and organized to every single sponsor.
The automation itself is triggered when you add a specific tag (let's call it "Active Sponsor") to a sponsor's contact profile. From there, it's a simple, timed sequence of events.
Here’s a breakdown of the workflow:
- The Trigger: The whole thing kicks off the moment you add the "Active Sponsor" tag to the sponsor’s contact in ConvertKit.
- Pre-Campaign Reminder: Next, you'll add a delay that waits until 7 days before the Ad Run Date. Once that day hits, the automation sends a friendly email reminder. This is the perfect time to ask them for their final ad copy and link if they haven't sent it over yet.
- Final Confirmation: Add another delay, this time waiting until the day before the run date. A short email goes out confirming you have everything you need. It’s a small touch, but it gives sponsors peace of mind and shows you’re on top of your game.
- Post-Campaign Report: Finally, set one last delay for 3 days after the Ad Run Date. This triggers the final email, which is their performance report. You'll include key stats like the newsletter's open rate and, most importantly, the total number of clicks on their ad.
This straightforward sequence ensures every sponsor gets the same professional, consistent experience. It practically eliminates the chance of human error and frees you up to focus on what actually matters, creating an amazing newsletter.
Tracking Performance and Reporting to Sponsors
Landing the sponsor is just the start. The real secret to building long-term, profitable partnerships is proving your value with clear, transparent data. A professional performance report isn't just a nice-to-have. It's what builds trust and gives sponsors the confidence to book with you again and again.
The good news is that ConvertKit makes this part incredibly straightforward. You don't need to mess with complex analytics software. All the data you need is waiting for you right inside your broadcast reports.
Finding the Right Metrics in ConvertKit
Once your sponsored newsletter goes out, give it about 48 to 72 hours for the numbers to settle. Subscribers don't always open emails immediately. After that window, head over to the specific broadcast in your ConvertKit account.
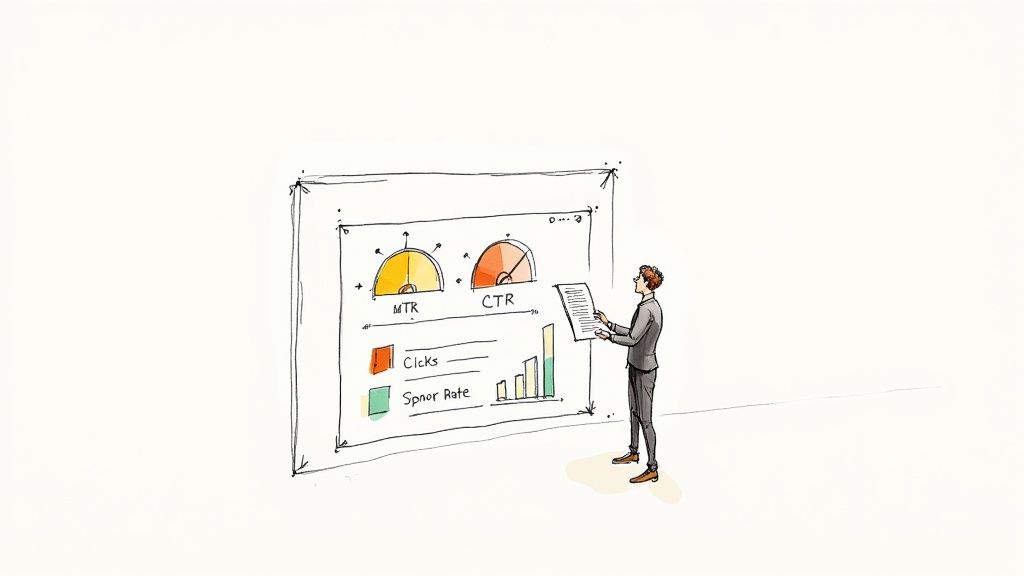
You’ll want to focus on two core metrics that every single sponsor cares about:
- Open Rate: This is the percentage of your audience that opened the email. It’s a solid indicator of your newsletter's overall reach and engagement.
- Click-Through Rate (CTR): For most sponsors, this is the money metric. It shows the percentage of people who actually clicked their sponsored link.
ConvertKit’s built-in link tracking is your best friend here. Because you gave the sponsor’s link a unique URL when you set up the campaign, you can see the exact number of clicks it received. That click count is the proof of performance they’re paying for.
Building a Professional Sponsor Report
You don’t need anything fancy. A clean, simple email or a one-page PDF gets the job done perfectly. Your goal is to present the data clearly and frame it in a way that highlights the value you delivered.
A great performance report does more than just share numbers; it tells the story of the campaign's success. It’s your best sales tool for securing that next contract.
As you refine your ad system, it's also a great time to implement strategies to increase email open rates, which ensures your sponsored content gets in front of as many eyes as possible.
What to Include in Your Report
Keep your report concise and easy to scan. Here are the must-have components I include every single time:
- Campaign Snapshot: Start with the basics. Put the sponsor’s name, the newsletter issue date, and a link to the web version of the email so they can easily reference it.
- The Key Numbers: Present the core metrics clearly. I always list the total subscribers the email was sent to, the final open rate, and, most importantly, the total clicks on their specific link.
- Audience Context (Optional but Recommended): Add a quick reminder of who they reached. A simple line like, "This campaign was delivered to over 5,000 creators and marketing professionals," adds powerful context to the numbers.
- Thank You & Next Steps: Always end on a high note. Thank them for their partnership and let them know you'd love to work together again. This is the perfect spot to mention any upcoming ad slots you have available.
Following this simple reporting process turns your ad operation from a casual side gig into a professional business. It shows sponsors you’re serious about delivering results, which justifies your rates and paves the way for a steady stream of repeat business.
How to Automate Invoicing and Payments
Let's be honest. Chasing down payments from sponsors is the worst part of the job. It’s a huge time-sink and can feel incredibly awkward. Setting up an automated system to handle your invoicing and payments isn't just a nice-to-have. It's essential if you want to run this like a real business and get back to creating great content.
The whole point is to create a hands-off process. An invoice should automatically get generated and sent the moment a sponsor agreement is locked in or right after their ad runs successfully. This small change will make managing your ConvertKit newsletter ads so much more efficient.
Connecting to a Payment Processor
ConvertKit is a powerhouse for email, but it doesn't handle payments. That’s where a dedicated payment tool comes in. Stripe is pretty much the industry standard for a reason. It's incredibly reliable, secure, and plays nicely with almost every other platform out there.
By connecting a payment processor, you build a simple, repeatable workflow. You can get a better sense of how a direct Stripe integration for newsletter ads makes this whole process nearly effortless. This kind of setup lets you create unique payment links or pages that you can send directly to sponsors for one-off ads or even recurring placements.
Building Your Automated Workflow
This is where you start to really reclaim your time. The idea is to have an invoice triggered automatically at a key moment in the sponsorship process. You could use a tool like Zapier to connect ConvertKit to an invoicing platform like FreshBooks or QuickBooks, or you could simplify things with an all-in-one newsletter ad management tool.
Here's what a simple automated sequence could look like:
- The Trigger: A sponsor gets tagged in ConvertKit as "Ready for Invoice" after you've confirmed the booking.
- The Action: This tag instantly tells your payment software to create a new invoice, automatically pulling the sponsor's contact info and the rate you both agreed on.
- The Delivery: The system then emails the professional-looking invoice directly to your sponsor, with all payment terms clearly stated.
If you're interested in going deeper on this, exploring the benefits of business process automation offers some great insights for streamlining your entire operation.
The real power of this system is consistency. Every sponsor gets the same professional treatment, invoices go out on time without you lifting a finger, and you get paid faster. It removes the awkward follow-ups and keeps your cash flow predictable.
What to Include on Your Invoice
A professional invoice does more than just ask for money. It builds trust and ensures you get paid correctly and on time. Don’t just fire off a payment link in an email. Provide a clear, itemized document.
Make sure every invoice you send includes these key details:
- Your Business Information: Your newsletter's name and contact details.
- Sponsor's Information: The company name and billing contact.
- Invoice Number and Date: Absolutely crucial for clear record-keeping.
- Line Item Description: Get specific. Instead of "Ad," write something like, "Primary Sponsorship – May 15th, 2024 Issue."
- Amount Due: The total cost of the sponsorship.
- Payment Terms: Clearly state your due date, whether it's "Due upon receipt" or "Net 15."
Creating a simple template with these fields guarantees every invoice is complete and professional. It just makes the whole payment process smooth for everyone involved.
A Few Common Questions
When you're first setting up a system to manage sponsorships in ConvertKit, a few questions always pop up. Getting these sorted out early on will make your whole operation feel more professional and, more importantly, profitable right from the start.
How Do I Land My First Sponsor?
This is the big one, right? The best place to start is by looking at the brands your audience already knows and trusts. Who do they talk about? What tools do they already use?
Your own audience is a goldmine for sponsor ideas.
- Make a list of products or services they mention in replies or your community.
- Check out who is sponsoring other newsletters in your niche.
- Consider using platforms that connect creators with brands for some inbound leads.
Once you have a shortlist, create a simple one-page media kit with your key stats and pricing. Then, just start reaching out. Your first sponsor is often just one clear, direct email away. Don't overthink it.
What Numbers Do Sponsors Actually Care About?
Sponsors want to see the metrics that directly translate to results. Focus on the big three. Total subscribers, average open rate, and average click-through rate (CTR), especially on past sponsored links.
If you've collected demographic data, like your readers' locations or job titles, that's pure gold. Include it.
The key is transparency. A smaller list with die-hard, engaged fans is often way more valuable to an advertiser than a huge list of people who never open your emails. High engagement is your biggest asset, so lead with that.
Honesty in your reporting builds trust, and trust is what turns a one-time sponsor into a long-term partner. When sponsors know exactly what they're paying for, they're more likely to come back and pay higher rates down the line.
Can I Really Do This on the ConvertKit Free Plan?
Yep, you absolutely can. The free plan is perfect for getting started with manual ad management. You can easily paste ad copy into your emails, use ConvertKit’s link tracking to see who clicks, and handle all the sponsor communication yourself.
As you grow, though, you'll start to feel the pain of doing everything by hand. The more advanced automation features on ConvertKit's paid plans are designed to help you manage sponsors at scale. When your ad revenue starts to pick up, upgrading often pays for itself simply by saving you time and letting you build a much smoother system.
If you're ready to ditch the spreadsheet chaos and get your sponsor tracking, invoicing, and fulfillment on autopilot, Ad Slots can help. Turn your newsletter ads into a streamlined system today.